How to run Windows 10 on an Apple Silicon Mac
Ever since Boot Camp was introduced on Macs back in 2006, it hasn’t been an uncommon task to run Windows on a Mac. Boot Camp allowed users to dual-boot macOS and Windows, running both operating systems on bare metal hardware. That changes with Apple Silicon.
Despite the fact that both Windows 10 and macOS run on ARM now, Boot Camp doesn’t work with Apple’s M1 processor. Yes, you can still run Windows 10 on Apple Silicon, such as on the M1-powered iMac. But no, you can’t do it through Boot Camp. You’ll have to use virtualization software.
What you’ll need
- A Mac with Apple Silicon. An Intel-powered Mac works too, but this guide is geared toward ARM Macs.
- Parallels Desktop, which you can download here. There’s a free trial, but you’ll need a license. The home and student versions are $79.99, while the Pro and Business Editions are on a subscription model at $99.99 a year.
- A Windows 10 on ARM image, which is available in preview here. These are really made to be run in Hyper-V VMs, so since Hyper-V on ARM is still in preview, so is the VHDX image.
- A Windows 10 license. You can purchase one on Amazon here, or you can buy one through the Microsoft Store.
What to do to run Windows 10 on Apple Silicon
- Install Parallels Desktop. It’s easy and very straightforward. Just open the installation file, click the button to install it, and follow the very few instructions that appear. You’ll land on a screen that tells you that you can’t run an x86 OS on an ARM PC. Click Continue.

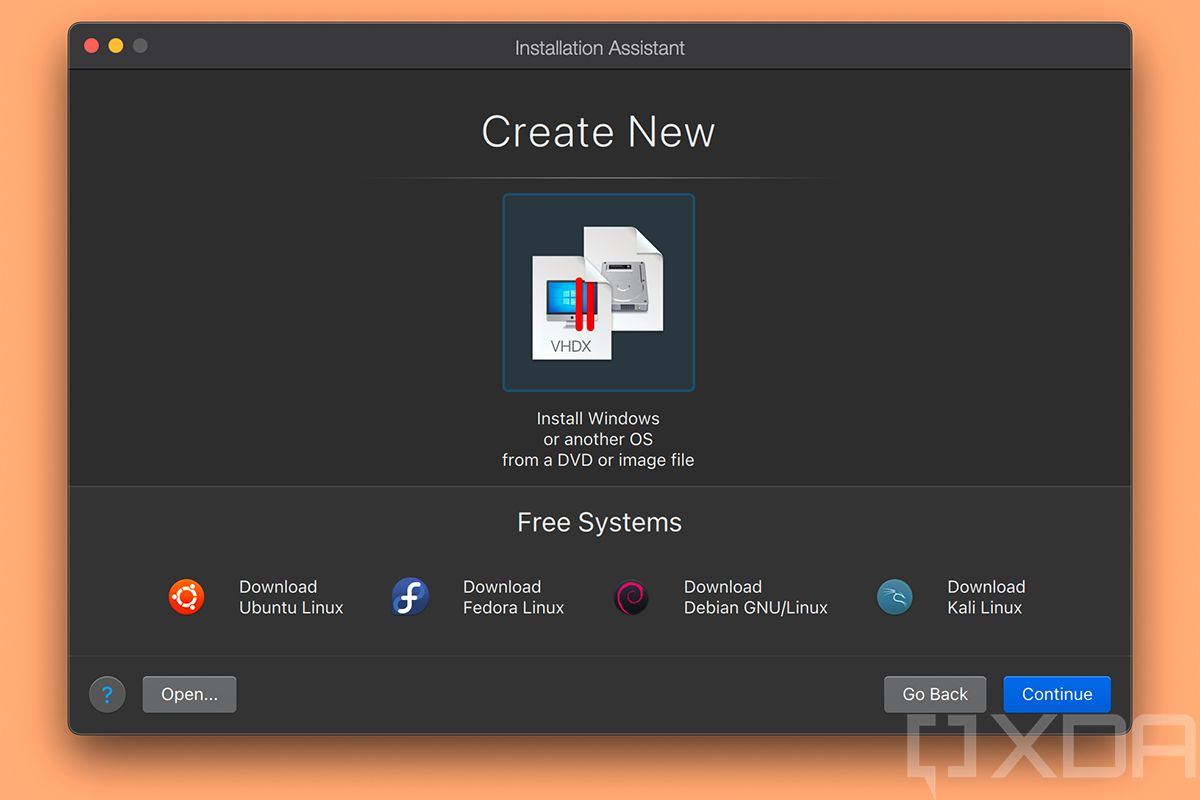
- That’s going to bring you to a page asking what you want to create. You’ll quickly see that while Windows is the main option, there are a variety of Linux choices as well. For this tutorial, we’re focusing on Windows 10, but the process for Linux should be similar. Click Continue.

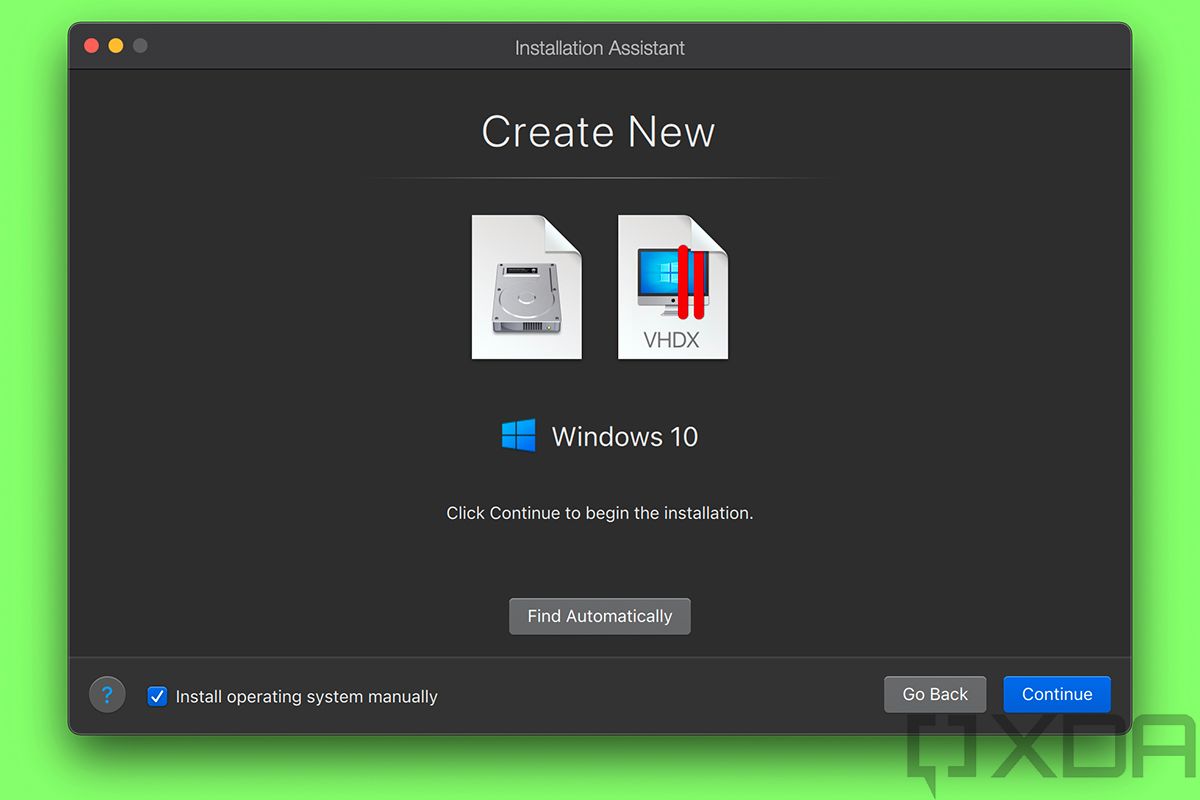
- After choosing Windows, it’s going to ask you where to get your installation image from. It automatically searches files on your computer, so if you have a lot of images, you might have to choose manually.

- After you’ve selected your image, you’ll get a confirmation that you’re about to install Windows 10 on your Mac. You can probably leave that option to “Install operating system manually” unchecked, as I did the first couple of times I went through this process. I checked it here just to show more options.

- The next few steps only show up if you chose to install Windows manually. Otherwise, skip to the next step that looks like what you see below. Now, it’s going to ask what you’re going to use Windows 10 for. Parallels will adjust the resources the VM will use on your Mac depending on what answer you pick here.

- Next, you’ll choose where you want to save the Windows VM on your Mac.

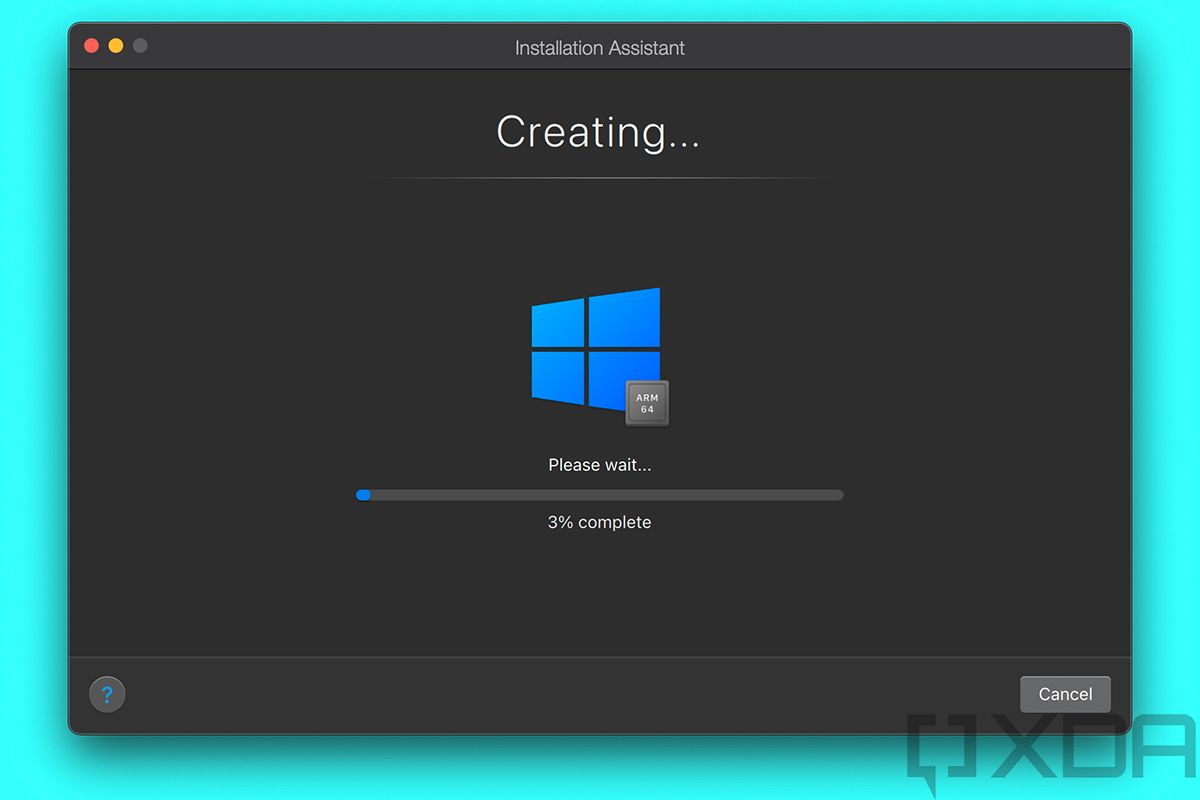
- After that, you’ll get a progress bar saying that the Windows 10 VM is being created on your Apple Silicon Mac.

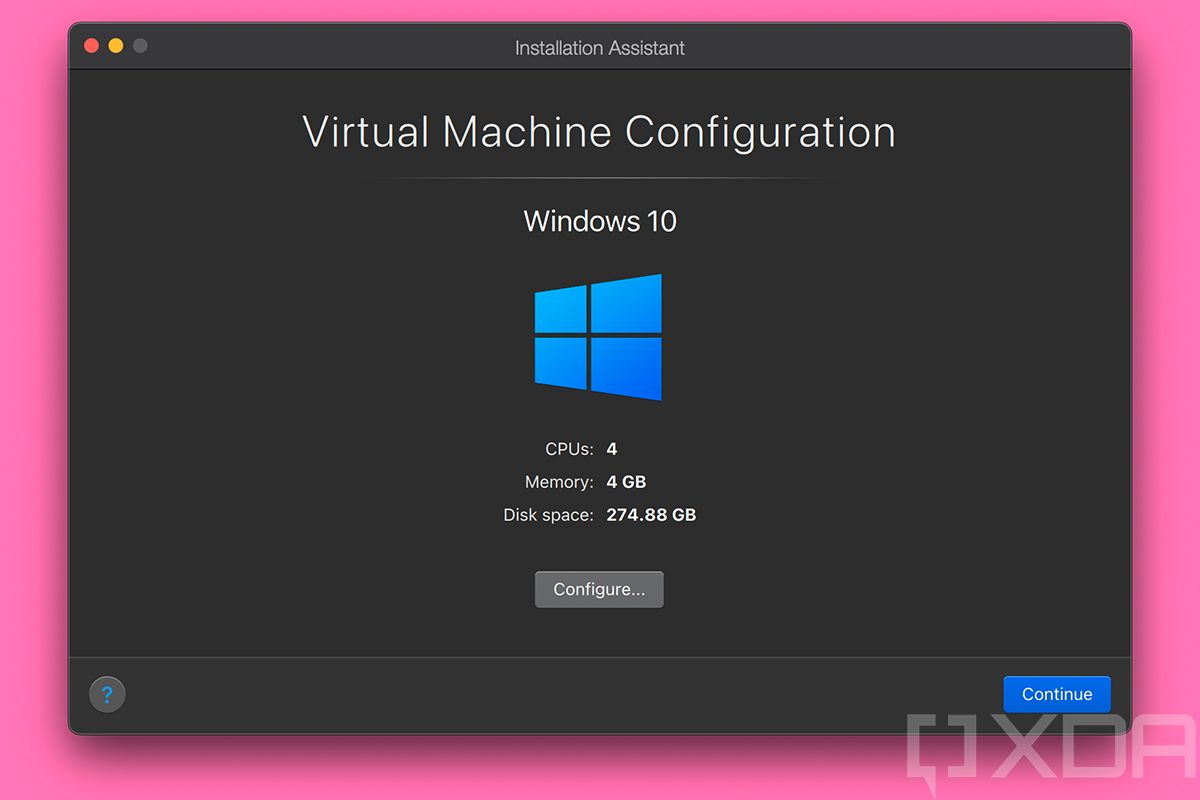
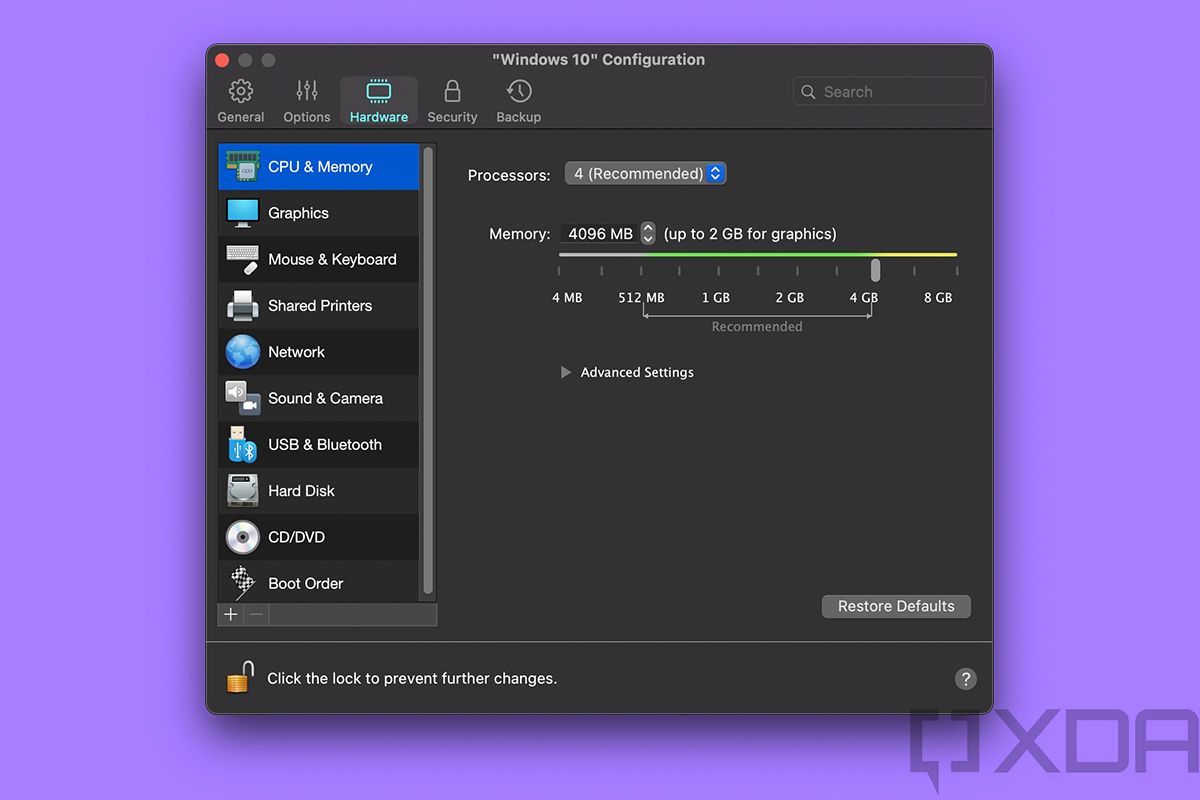
- Next, you’ll see your VM configuration, and there’s a Configure button to change settings for it.

- Like any virtualization software, you can change any resources you want. You can change this stuff later, but keep an eye on the Hardware tab. That’s going to let you decide which of your M1 Mac’s resources to allocate to the Windows 10 VM.


- Once you’re done, you’re ready to spin up your Windows 10 VM!

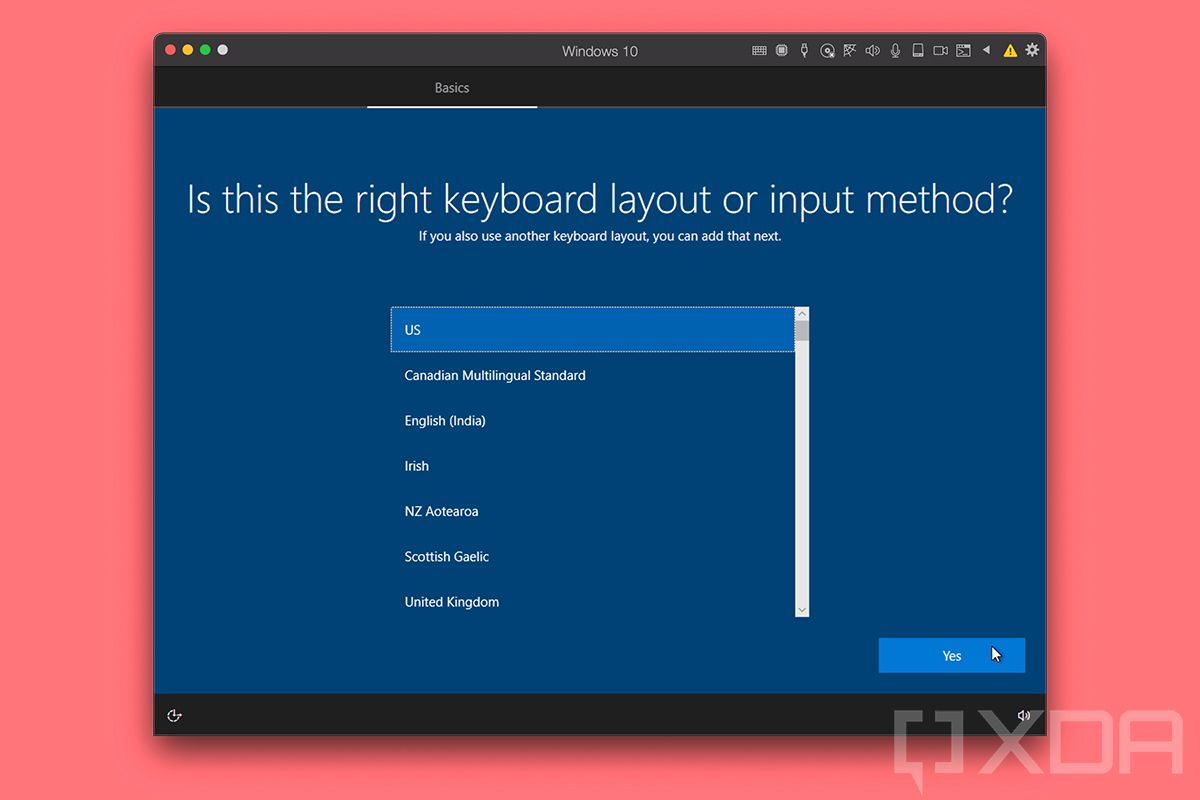
- Because of the options I chose, Parallels is going to take me into the out-of-box-experience. If you went with default settings, you’ll start off with a local Windows account.

- Once Windows 10 starts for the first time on your M1 Mac in Parallels Desktop, you’ll see a message that it was successful.

- There’s a lot of integration with macOS here. You can see from the image above that I started off with a ton of icons on my desktop. That’s because those are actually the icons that were on the macOS desktop (they’re actually the screenshots that you see here). There’s also a OneDrive folder that’s hooked into the OneDrive that’s installed on macOS, so if you start with that local account, it still works. You can even set your default browser to Safari.

- You’ll want to sign in with a Microsoft account, though. For that, go to Settings -> Accounts and choose to sign in.

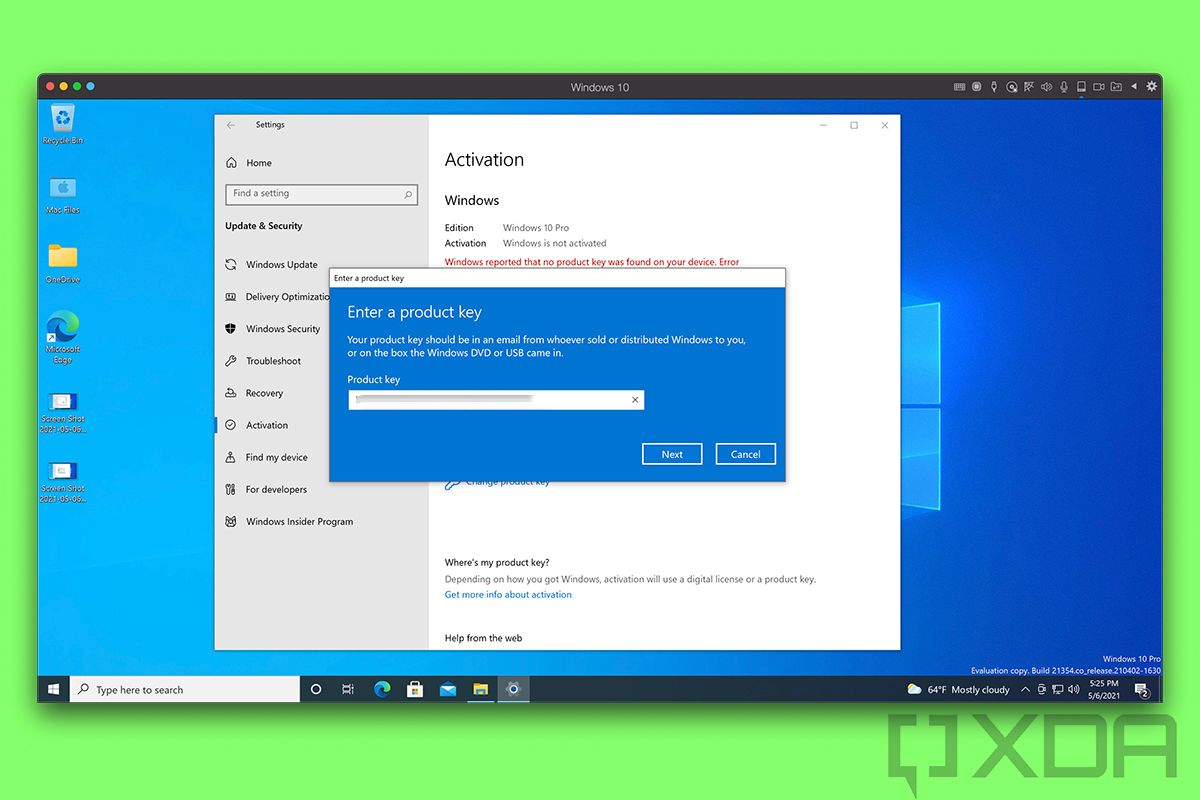
- You’ll also need to activate Windows 10 by going to Settings -> Update & security -> Activation. Use the product code mentioned earlier.

- After that, Windows will be activated and you can do things like changing the theme. Windows will let you use it for a while without activating it, but unless you’re just installing Windows 10 on your M1 Mac for fun, you probably want to keep it running for a while.

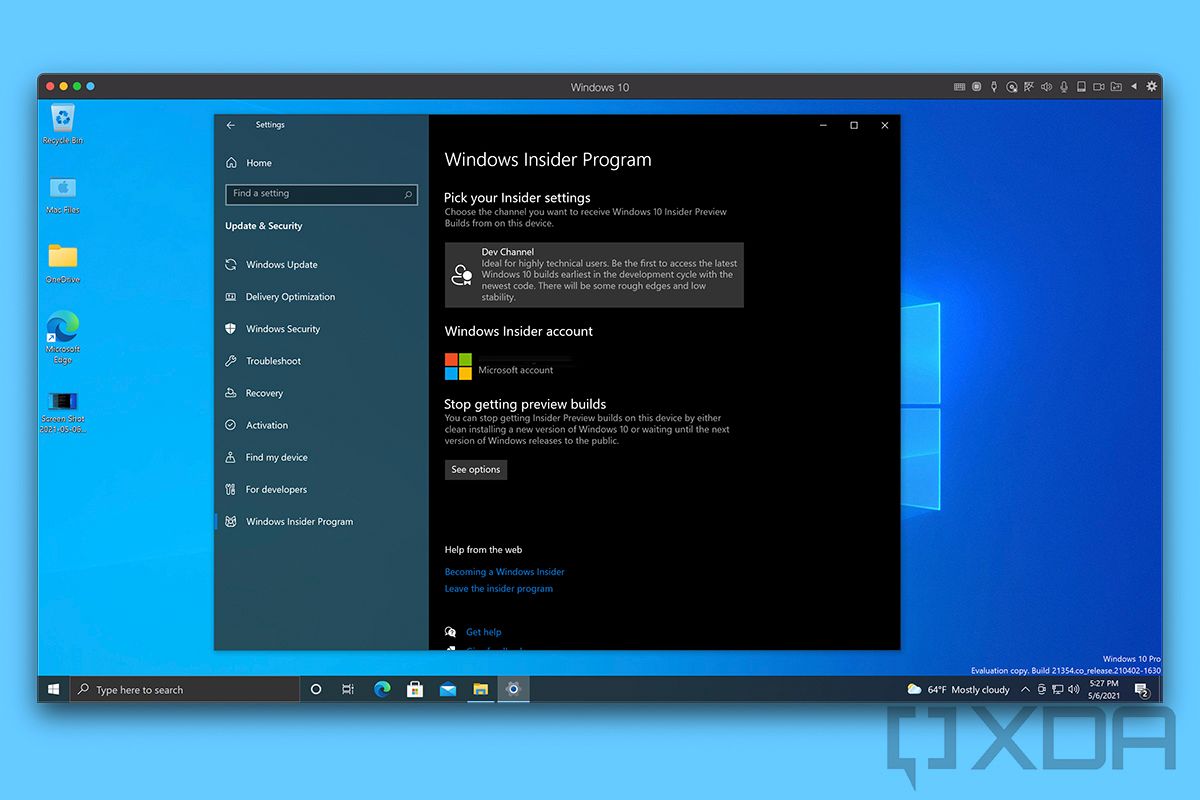
- Next, go to Settings -> Update & security -> Windows Insider Program, and click Get started. You might have to turn on some data collection stuff.

- Make sure that you’re signed in with your account and it’s set to the Dev channel.

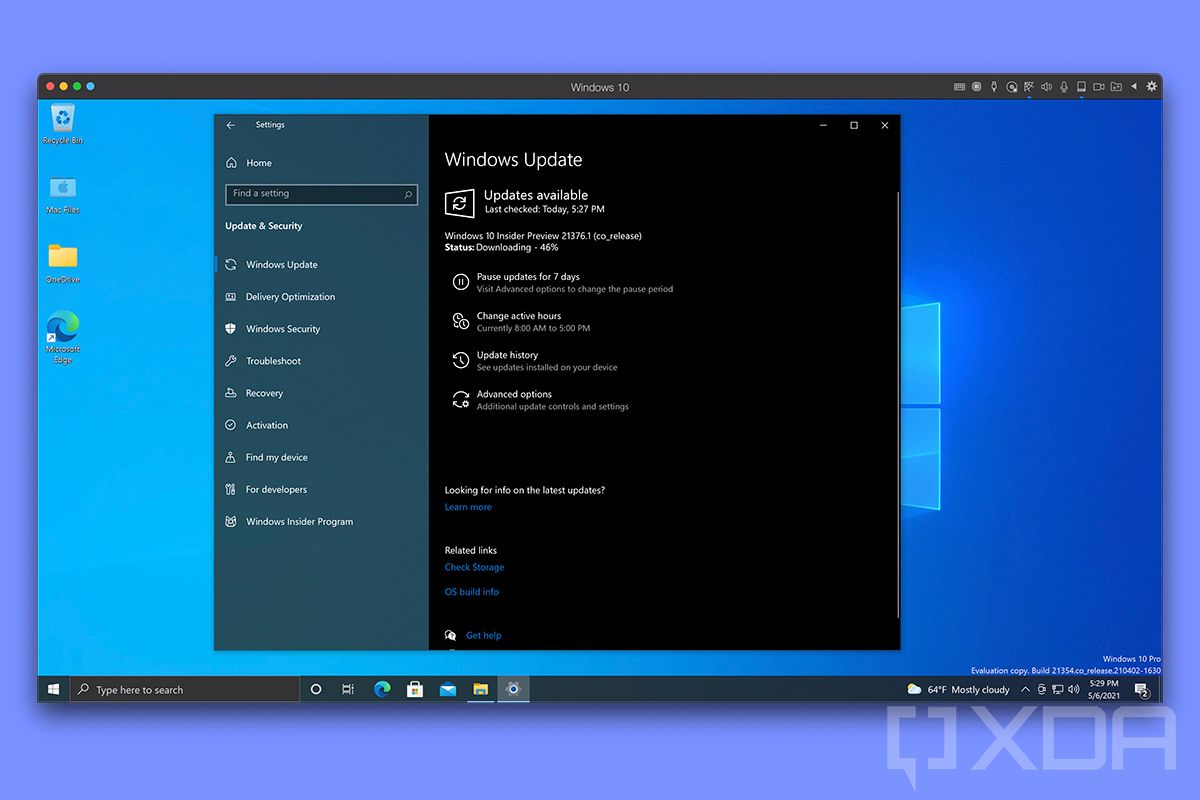
- After that, under the Windows Update tab, check for updates. You’re going to have to use preview builds until the fall Windows 10 feature update, and you’ll get weekly builds.

- You’re all set to use Windows 10! Everything should work on your Apple Silicon Mac as you’d expect, and Parallels put a lot of thought into making sure that the integrations you need are there. If you’re thinking about how you can access a macOS file from Windows 10 or vice versa, don’t think about it. Just go do it and the chances are that it already works the way you were hoping.


One thing to take note of is that pretty much every Windows 10 built-in app is going to tell you that it’s updating before you can open it. Up until fairly recently, these apps just didn’t work. That’s because this 64-bit ARM version of Windows 10 ships with 32-bit ARM versions of its built-in apps. This isn’t even about legacy support, as there’s never been a 32-bit Windows on ARM PC. These apps were quite literally made for Windows phones.
But Apple Silicon doesn’t support 32-bit ARM apps, simply because there haven’t been 32-bit ARM apps in the Apple ecosystem in ages. Now, Windows on ARM actually pulls down the x64 app (no, they’re not ARM64, as that would make too much sense) and it runs in emulation.
In any case, you’re good to go with Windows 10 on your Apple M1 Mac. It’s all a very straightforward process, right? While I browsed the different settings for VM resources, I didn’t adjust any myself. Apple’s unified memory and M1 chipset are so good that with the default 4GB of RAM, Windows 10 ran fine on my Mac. I’d recommend using the default settings, and if for some reason that’s not enough, you can tinker with it later.
If you’re looking for a dual-monitor setup where you can have Windows 10 on one screen and macOS on another, check out our guide for using an external monitor with an Apple Silicon Mac. There are some limitations that you might not expect.

- Parallels Desktop virtualization software for running Windows or Linux on macOS


- Apple's new all-in-one has a 4.5K display, an M1 chipset, and comes in pretty colors
The post How to run Windows 10 on an Apple Silicon Mac appeared first on xda-developers.
from xda-developers https://ift.tt/3hx8H4t
via IFTTT
No comments: